
Exchanging context has always been a critical pillar of networking. Exchanging routes, synchronizing tables, building trees, there are many different networking protocols and frameworks that have been defined and refined over the years intended to make sure that data is flowing freely.
What if we had a way to exchange intelligence between systems similar to the way we exchange routes today? That is coming to the forefront through model context protocol (MCP).
This latest technique builds upon all those other articles that I’ve written over the last several years… articles about the importance of the quality of data, the importance of leveraging data science techniques to debug the network and detect anomalies, the importance of a clean and scalable data pipeline, so on and so forth. Now that we have a solid foundation in place it’s time for the next evolution – using frameworks like Model Context Protocol to put it all together.
Model Context Protocol:
So what is Model Context Protocol?
Think of it like the equivalent of the USB framework for connecting peripherals – except in this case we’re connecting LLMs via APIs. Model Context Protocol allows systems to easily connect and exchange tools and information. Here’s a quick simplified graph showing how it all fits together.

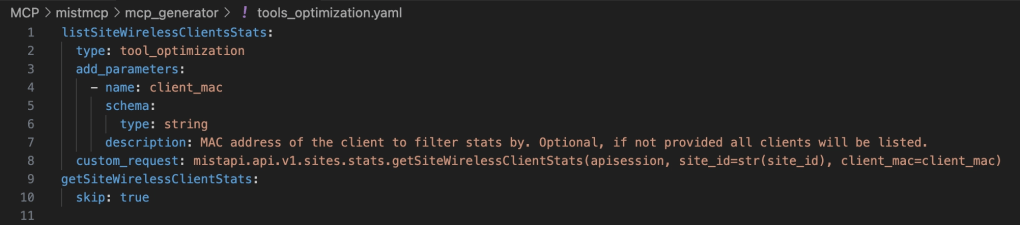
In brief, your large language model of choice hook into the MCP Client. The MCP Client is then programmed with different MCP Servers, sometimes an MCP registry if you have a large enough MCP ecosystem. These MCP Servers will advertise different tools that they have available and give a rundown of how the tools can be used. For example, here’s a description of a tool that shows how to get wireless client stats:
The MCP Client will select a tool, instruct the MCP Server on what they need to see, and then the MCP Server will execute the call and return the information to the MCP Client for analysis.
The LLM in this architecture becomes the glue for the context – interpreting intent, reasoning, tying components together, and providing the user interface. The MCP framework becomes the blueprint for gathering data in a standardized format. Multiple MCP services can then be tied together into the MCP framework, allowing you to take intelligence from one system and correlate it with data from other systems.
MCP in Action:
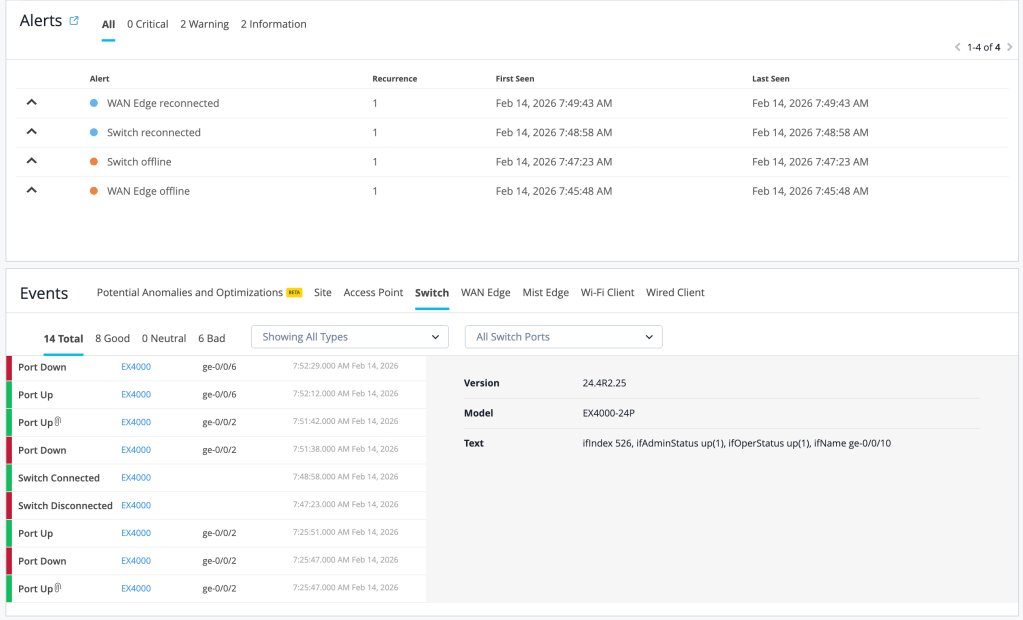
Let’s take an example from an HPE Mist environment that I’m working on currently. If you know the Mist dashboard, you’ll recognize this view – these are the Site Insights for an environment. These show that there was a blip in the environment.
For comparison, here’s an example of using MCP to troubleshoot this. In this case I’m using Claude Desktop as the MCP client.
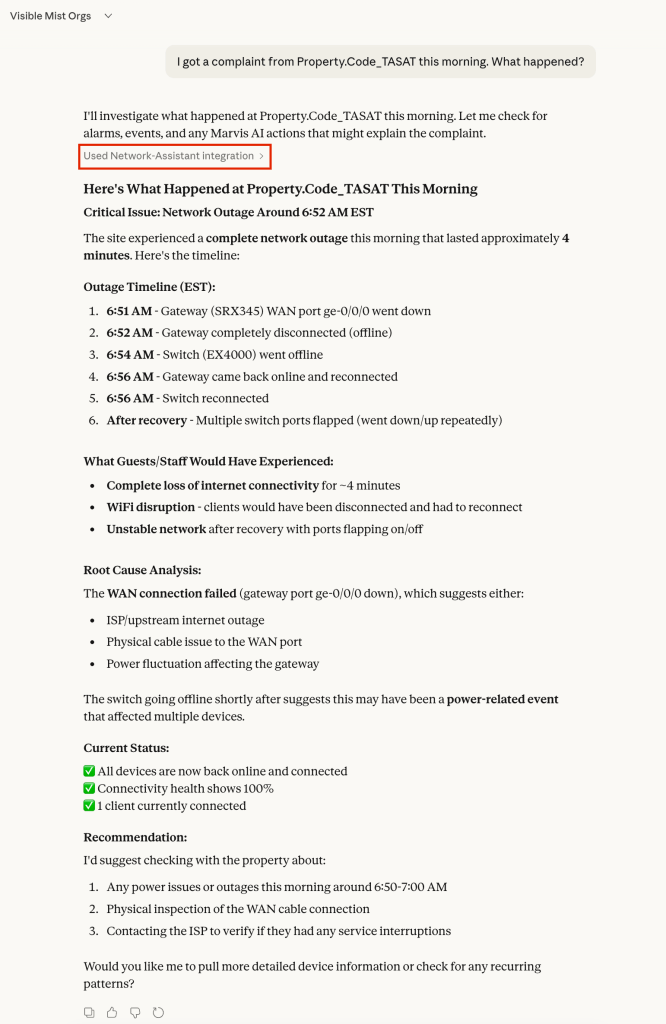
Note the area that I’ve highlighted in red. The first time that Claude Desktop wants to call a tool it will ask permission. In this case it called multiple tools, analyzed the data, and provided a summary.
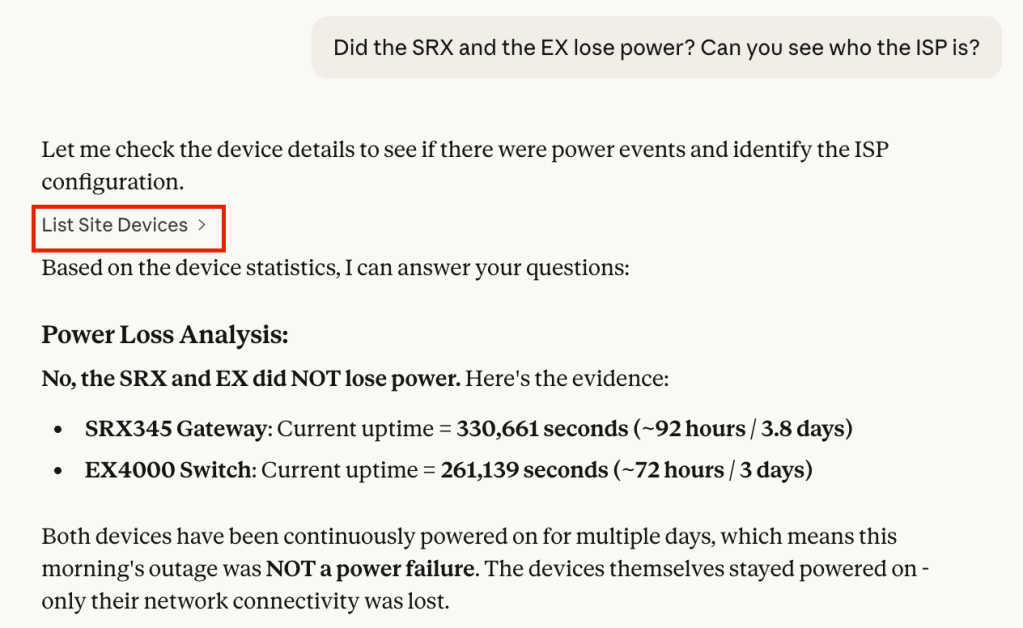
From here you can ask follow-up questions – notice that the MCP client continues to make calls, gathering the data necessary to troubleshoot the issue.
Trying it for Yourself:
To get started in your environment you’ll need to stand up your own MCP server and configure an MCP client.
For now, let’s use a locally hosted MCP server. Thomas Munzer has created an incredible MCP Server image that is available on Github. Please note that this image is provided as-is, it is meant for lab environments so you can see how the pieces fit together. Stay tuned for more options in the near future.
Here’s a link to the repository:
https://github.com/tmunzer/mistmcp
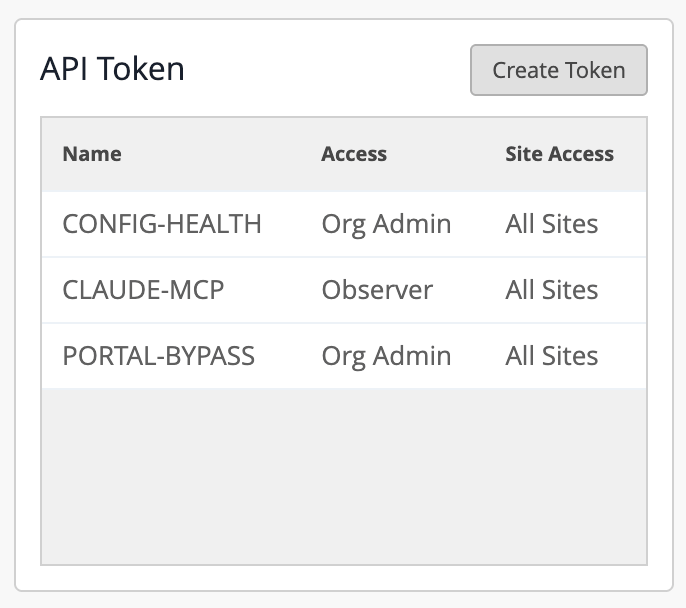
Once the MCP server is installed and reachable you will need to generate an Org API token in your Mist environment. This is a token that will be limited to a specific organization and it can be configured with limited access permissions (depending on your comfort level with AI). Go to Organization -> Organization Settings -> API Token:
Next, you will need to configure your MCP client to use this MCP server as a resource. I’m using Claude Desktop. From Claude, go to Settings -> Desktop app -> Developer -> Local MCP servers -> Edit Config. This will take you to your claude_desktop_config.json file. Enter a modified version of the config below – in my case the server is located at 10.0.1.252 and I’m in Global 01. Customize this with your API token that you created in the previous step.
{ "mcpServers": { "mist-http": { "command": "npx", "args": [ "-y", "mcp-remote", "http://10.0.1.252:8000/mcp/?cloud=api.mist.com", "--header", "X-Authorization:${MIST_APITOKEN}", "--transport", "http-only" ], "env": { "MIST_APITOKEN": "your-api-token" } } }}
Once you save the config file do a full reboot of Claude Desktop. You can then start asking it questions about your Mist environment.
In Summary:
This gives us a new way to interact with the data – and a way to stitch together data from multiple systems for automated triage and recon. For example, if there is a complaint at a specific site ID you can use the MCP service from Mist to check the network view but then use the hypothetical MCP service from the ISP to check to see if there were any outages reported in the area or the MCP service from other complementary systems to get a full picture from the site.
Systems like these are only as good as the underlying foundational data! If the system does not have full API support, built-in anomaly detection, forecasting, experience validation, and pro-active health monitoring then it won’t be as useful. This is not a shortcut but rather a promising step forward in the way that we monitor and troubleshoot our environments.
